
How to Keep Coffee Fresh While Camping
Table of Contents
- Why Your Camping Coffee Goes Stale So Fast
- Best Coffee Storage for Camping: Containers That Actually Work
- Pre-Ground vs Whole Bean for Camping: Which Keeps Better?
- How to Keep Coffee Dry While Hiking: Moisture Control on the Trail
- Portable Equipment and Repeatable Measurements for Fresh Camp Coffee
- Field Troubleshooting: When Your Coffee Tastes Off
- Frequently Asked Questions
Last Updated: October 8, 2026
Why Your Camping Coffee Goes Stale So Fast
The number one reason camping coffee tastes flat is simple: oxygen, moisture, and heat get to the beans before you do. Knowing how to keep coffee fresh while camping starts with understanding what you're fighting.
Coffee beans start losing flavor the moment they hit air. At Old Guy Outdoors, we roast to order for exactly this reason. Freshness is not a marketing line. It is the whole game.
The Three Enemies: Air, Moisture, and Heat
Oxidation is the first enemy. Oxygen reacts with the oils in coffee and turns bright flavors dull and cardboard-like.
Moisture is the second. Damp beans clump, clog your grinder, and brew unevenly.
Heat is the third. A sealed bag sitting in a hot car or sunny tent cooks the beans slowly.
Here is how fast each one does damage:
| Enemy | What It Does | How Fast | Best Defense |
|---|---|---|---|
| Air | Oxidizes oils, kills aroma | Days once opened | Vacuum seal or squeeze out air |
| Moisture | Clumps grounds, causes uneven brew | Hours in humid air | Airtight hard container |
| Heat | Bakes beans, adds staleness | Hours in direct sun | Shade and a cool storage spot |
A common mistake is buying a big bag for a week-long trip. For more on how storage affects flavor, the Specialty Coffee Association's guidance on coffee freshness is worth a read before your next trip.
Best Coffee Storage for Camping: Containers That Actually Work
The best coffee storage for camping is an airtight, opaque, hard-sided container that blocks air, light, and moisture. Vacuum-sealed bags work for travel to the site, but a hard container wins once you're there and opening it daily.
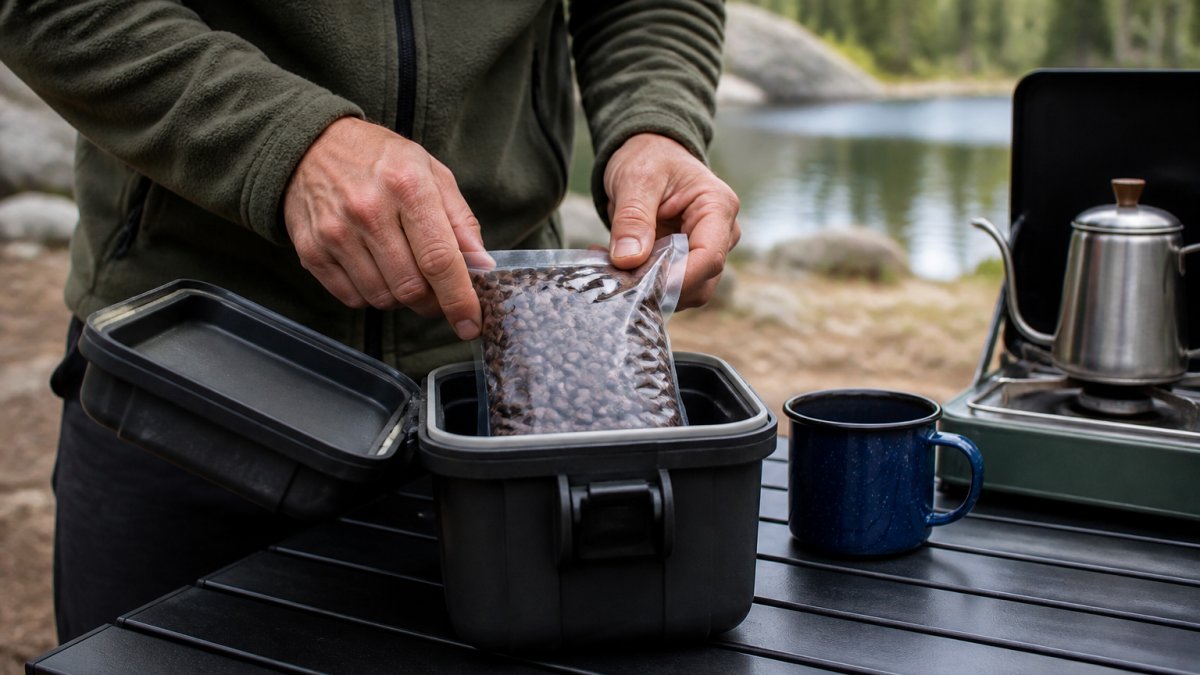
Vacuum-Sealed Bags vs. Hard Containers
Each option has a clear job. Match the container to the trip.
- Vacuum-sealed bags: Best for travel and long storage. Once opened, they lose their seal fast.
- Hard containers: Best for daily camp use. They hold their seal and stack in a pack.
- Resealable pouches: Fine for a single weekend. Weak against moisture over time.
A vacuum bag alone is not enough for a week in the woods. Bring a hard container for the beans you'll actually use.
Pre-Ground vs Whole Bean for Camping: Which Keeps Better?
Whole bean coffee stays fresh far longer than pre-ground. Grinding exposes more surface area to air, so pre-ground coffee can go stale in days while whole beans hold up for weeks.
That said, pre-ground is not wrong for every trip. It depends on your gear and how long you're out.
- Whole bean: Best for trips over three days, or if you pack a hand grinder.
- Pre-ground: Fine for a quick overnight when weight and simplicity matter most.
- Grind on site: The freshest option if you have a portable grinder and the patience.
If you want to skip the grinder entirely, our Instant Coffee comes in a resealable pouch with 30 servings, so there's no open bag of grounds to worry about. For a longer trip with a little extra, the Instant Coffee with Mushroom gives you about 42 servings in one package.


How to Keep Coffee Dry While Hiking: Moisture Control on the Trail
Keeping coffee dry while hiking comes down to one rule: seal it before it ever touches damp air. Moisture is the fastest way to ruin a good bag of beans on the trail.
Rain, sweat, and humid mornings all work against you. A few habits keep your coffee dry.
- Pack coffee in a zip bag, then inside a hard container.
- Keep it in the middle of your pack, away from wet gear.
- Add a small silica packet to absorb stray moisture.
A dry bag inside your pack adds a second layer of protection. It costs almost nothing and saves a whole trip's worth of coffee.
Portable Equipment and Repeatable Measurements for Fresh Camp Coffee
Fresh coffee needs consistent measurements, even in the woods. The USDA guidance on safe drinking water matters here too, since clean water is the base of any good cup.
Most campers eyeball their coffee and get wild swings in strength. Repeatable measurements fix that. Pack these basics:
- A small digital scale that reads in 0.1-gram increments
- A hand grinder with adjustable burrs
- An airtight container for the beans
A simple ratio keeps things easy: one part coffee to fifteen parts water by weight. For a 12-ounce mug, that is about 22 grams of coffee to 340 grams of water.
Controlling Brew Water Temperature on a Camp Stove or Fire
This is where most camp coffee goes wrong. You want water between 195°F and 205°F.
On an open fire, control is harder. Move the pot to the edge of the coals, not the center of the flames.
At altitude, water boils at a lower temperature. At 8,000 feet, water boils around 197°F. That is still within brewing range, but it means you cannot rely on a rolling boil as a sign of 212°F.
Measuring Without a Full Home Setup
You do not need a laboratory. A few simple tools get you close.
- Scale: A 0.1-gram scale is the single best upgrade. It makes every cup repeatable.
- Scoop: If you leave the scale at home, use a level tablespoon. One level tablespoon of whole beans is roughly 5 to 7 grams, depending on the bean. Weigh it once at home so you know your scoop.
- Thermometer: A small instant-read thermometer takes the guesswork out of water temperature. It weighs almost nothing.
Water Sources in the Field
Water quality changes extraction. Hard water with high mineral content can mute flavors and leave a chalky taste. Soft water can make coffee taste flat or sour.
Our Enamel Mug is lightweight and durable, and it clips to a pack for easy access. Just note it's hand-wash only and can stain with coffee over time.

Field Troubleshooting: When Your Coffee Tastes Off
When camp coffee tastes wrong, the cause is usually one of six things: stale beans, moisture, a bad ratio, under-extraction, over-extraction, or your water. Run through the likely causes before you blame your gear.
Start with a taste check. Take a small sip and ask three questions:
- Does it taste sour, sharp, or like green apples? That points to under-extraction.
- Does it taste bitter, dry, or ashy? That points to over-extraction.
- Does it taste flat, cardboard-like, or just empty? That points to stale beans or bad water.
Use this field guide to narrow it down:
| Symptom | Likely Cause | Quick Fix |
|---|---|---|
| Sour, sharp, green-apple taste | Under-extraction (too coarse, too cool, too fast) | Grind finer, heat water hotter, or brew longer |
| Bitter, dry, ashy taste | Over-extraction (too fine, too hot, too long) | Grind coarser, cool water slightly, or shorten brew time |
| Flat, lifeless taste | Stale or oxidized beans | Switch to a freshly opened bag |
| Clumpy, uneven grounds | Moisture got in | Reseal and add a silica packet |
| Weak, watery cup | Too little coffee | Add more grounds |
| Harsh, bitter cup | Too much coffee or over-brewing | Cut the dose or shorten the brew |
| Metallic or chemical taste | Water quality or treatment | Switch to filtered or bottled water |
Distinguishing Under-Extraction from Naturally Bright Coffee
Some coffees are naturally bright. A Kenyan or Ethiopian bean can taste fruity and acidic even when brewed perfectly. That is not a defect. The difference is balance: under-extracted coffee tastes sour and hollow, with no sweetness behind it.
If you are unsure, brew a small test cup with water just off a boil and a finer grind. If the sourness fades and sweetness appears, you were under-extracting.
One-Variable-at-a-Time Adjustments
Change only one thing per cup. If you grind finer and brew longer at the same time, you will not know which fix worked. Start with grind, then water temperature, then brew time. Keep your coffee-to-water ratio steady at about 1:15 by weight while you troubleshoot.
Outdoor-Specific Causes Competitors Miss
Camp conditions create extraction problems that a kitchen never does. Cold air pulls heat out of your brew water fast, so a pour-over that finishes in three minutes at home can drop below 190°F before the last drop. Wind does the same thing to an open flame. At altitude, water boils at a lower temperature, so you may never reach the 195-205°F range that most brewers recommend.
Fix these before you touch your recipe:
- Cold air: Preheat your mug and brewer with hot water, brew close to the stove, and use a lid or a wind screen.
- Wind: Block the flame with a windscreen or a ring of rocks. A gusty flame gives you a moving target for temperature.
- Altitude: Bring water to a rolling boil, then let it sit for 30-60 seconds. It will still be hot enough to extract well even if it never hits 205°F.
Method-by-Method Fixes
Different brewers fail in different ways outdoors.
- Pour-over: Wind and cold are the main enemies. Preheat everything, brew close to the heat source, and keep the pour slow and even. If the cup is sour, grind finer before you change anything else.
- French press: Fine grounds and a long steep cause bitterness. Use a coarse grind, steep 4 minutes, then plunge slowly. If it is bitter, shorten the steep by 30 seconds.
- AeroPress: Fast and forgiving, but it cools quickly in cold air. Use water just off a boil, stir 10 seconds, and press within 1:30. If it is sour, add 15 seconds to the steep.
Start with the beans. If they smell dull, no brewing trick will save the cup. Fresh beans fix most problems before they start.
For a deeper look at what makes coffee taste its best, the National Coffee Association's brewing guide covers the basics well.
Frequently Asked Questions
What is the best way to store coffee beans for camping?
Pack whole beans in an airtight, opaque container and keep it out of direct sun and heat. Vacuum-sealed bags work well for short trips, but once opened, transfer beans to a hard-sided container with a tight seal. For trips longer than a few days, portion beans into single-use bags and squeeze out air before sealing. Old Guy Outdoors' Instant Coffee comes in a resealable pouch that works for backup mornings.
Should I pre-grind my coffee before a camping trip?
Grinding fresh at camp preserves more flavor, but pre-grinding is fine for short trips if you store it properly. Grind just before you leave, seal in an airtight container, and keep it cool. Pre-ground coffee loses aroma faster because more surface area is exposed to air. If you pre-grind, use it within 3 to 5 days for the best taste.
How do I keep coffee grounds dry in a tent?
Use a waterproof stuff sack or a hard-sided container with a gasket seal. Double-bag grounds in a zip-top bag inside a dry bag if rain is likely. Never store coffee on the tent floor where condensation pools. If you're hiking, keep coffee in the top of your pack inside a sealed bag, away from wet gear like rain jackets or water bottles.
Does temperature affect coffee freshness while camping?
Yes. Heat speeds up the oils going stale, so keep coffee out of hot cars, direct sun, and near campfires. Cool, shaded spots inside your pack or a cooler work best. If you're camping in summer, consider storing beans in a small insulated bag. Cold temperatures slow staling, but moisture from condensation is a bigger risk than temperature alone.
Camp coffee only tastes as good as the beans you start with, and stale beans ruin the best gear. At Old Guy Outdoors, we roast to order for maximum flavor and aroma, and our simple delivery service means you always have fresh coffee on hand without stocking up. Our resealable instant options and durable camp gear make it easy to keep your mornings on the trail tasting right. Get started with Old Guy Outdoors and fuel every adventure with a genuinely fresh cup.